We know you’ve done tons and tons of work to build a bigger engine, YOU, to power your bicycle. But did you know there are many small tweaks and changes you can make to your setup that will yield free speed on the bike? Well, it’s free in the sense that you don’t have to work any harder for it!
Bike Fit
The largest aerodynamic component of the bike/rider system is you, not the bike! Becoming properly fitted for your bike, for both comfort and improved aerodynamics, is the first action you should take in your quest to become more slippery to the wind. We highly recommend you contact Todd Kenyon of TTBikeFit.com. Todd has perfected the art of working with athletes remotely, via video and pictures, to improve their bike fits, so that you’re not limited by the skill and triathlon-specific fit knowledge of your local bike shop.
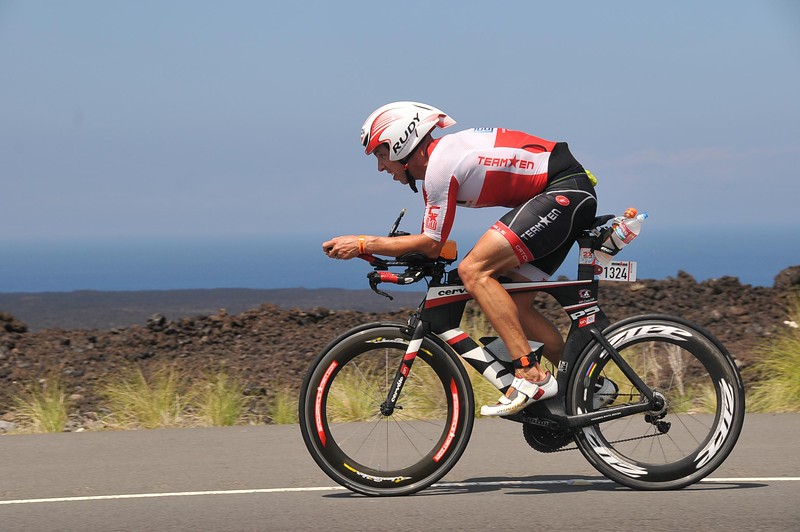
Race Helmet
You need to have a helmet on your head so you might as well wear one designed to cheat the wind. Based on testing we recommend the Louis Garneau P-09 racing helmet.
Racing Kit
Tight fitting, aerodynamic clothing has been the latest market innovation in the triathlon space and our athletes have tested some significant aerodynamic gains on the track. Check out the offerings from Louis Garneau and Castelli but understand that tight fitting is best, so have realistic fit expectation if you decide to try out these options.
Rear Wheelcover
Everyone knows that a rear disk wheel is faster than a “normal” wheel. But did you know you can achieve 99.99% of the aerodynamic benefits of that $$$$ disk wheel for less than $100? We highly recommend the Aerojacket wheelcover designed and manufactured by our good friends and long time sponsor Wheelbuilder.com.
Pro Tip: bring cassette tools with you to your next race so that if the weather changes and you decide to not race with a wheel cover you can quickly take it off.
Front Race Wheel
Running a deep dish, aerodynamic front race is another slippery speed trick.
Pro Tip: the handling of your bike in windy conditions is largely a function of the depth of your front wheel vs what you’re running for a rear wheel, with deeper dish wheels catch more wind than lower profile wheels. And the weight of the rider is the second factor, so smaller lighter riders should chose a medium profile wheel (ie, Zipp 202 or 404) while larger riders should look at a higher profile wheel (404 or 808)
Low Rolling Resistance Tires
You need to have tires on your bike, so you might as well be smart and choose tires that have been tested to have a very low rolling resistance. Based on tested data, we recommend Vittoria Open Corsa and Continental GP4000S clincher tires.
Pro Tip: be sure to use latex tubes on race day as well, as the combination of these tires and latex tubes is much faster than just any tire and butyl tubes. However, as latex tubes are fragile, take your time installing them and carry standard butyl tubes as your spare.
High Quality Chain
You need to have a chain on your bike so you might as well have one that’s been treated and tested to save you valuable watts on race day. We recommend our athletes purchase and race with an “optimized” chain by Ceramic Speed.
Pro Tip: the mojo of this chain only lasts for about 100-150 miles so use this chain for race week and race day only! After that, just train with it normally.
Smart Bottle Setup
You need to have bottles and tools on your bike so you might as well be smart about their placement. That said, understand that the significant difference between racing and training is the availability of aid stations and fresh bottles every 10-15 miles, as well as your Bike Special Needs bag for spares, etc. Therefore you can usually set your bike up much leaner for racing vs training: fewer bottle cages, smaller tool bag, etc, all adding to the simplicity of your setup and reducing aerodynamic drag.
- Between-the-Aerobars (BTA) Bottle: using a BTA system can clean up the air moving across the front of your bike while also making it easier to hydrate, with a straw sitting right in front of your face. Pro Tip: when not in use be sure to tuck that straw safely out of the wind vs sticking up and creating unwanted drag.
- Frame mounted bottle: a bottle mounted on the downtube is generally more aerodynamic than a bottle mounted on the seattube, and there are a number of aerodynamic bottles available to place in this position. Pro Tip: if you are sourcing your own liquid nutrition, be sure to rack this on your downtube, as this is generally the least ejection-prone bottle mounting location.
- Rear mounted bottle: the general rule is to keep whatever bottle setup you use, if you decide to use one, tucked in tight and low to your saddle. That is, you want to have your stuff back there to be in the windshadow of your lower back and upper legs.
- Tools: you generally want to be able to fix one flat before your Bike Special Needs bag, where you can stash another tube and Co2 if you need it. That said, good tool and spares locations are:
- In top tube mounted bento box position close to the stem, as this location can clean up the airflow coming off of the back of the stem.
- Tool pod carried in your low and tight rear cage setup.
Thanks for reading and please let us know if you have your own wind-cheating tips!

Leave a Reply